
Introduction to Snowball Cookies
When the holiday season rolls around, there’s something about the warmth of a freshly baked batch of snowball cookies that instantly puts everyone in a festive mood. These little confections, characterized by their snowy white appearance and melt-in-your-mouth texture, have become a beloved tradition in many households. So, what makes snowball cookies such a festive favorite?
The Allure of Snowball Cookies
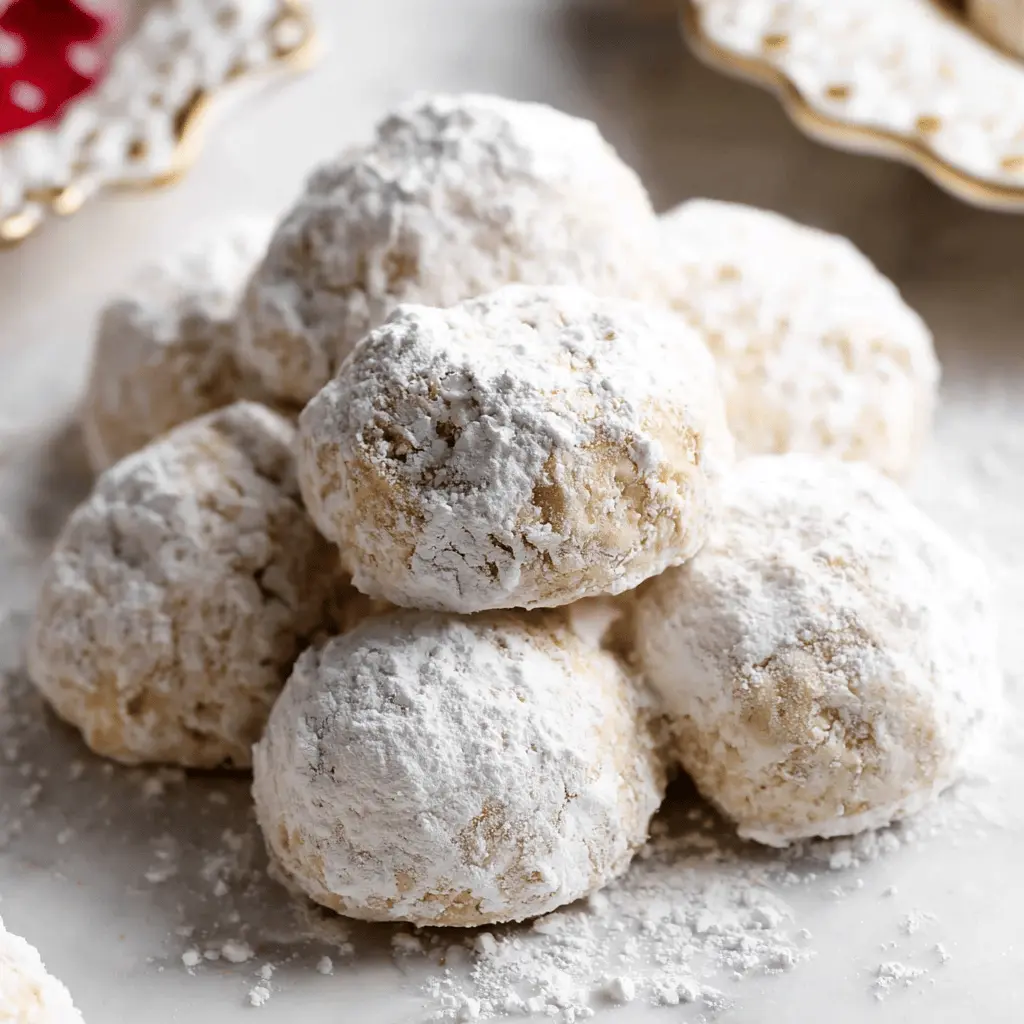
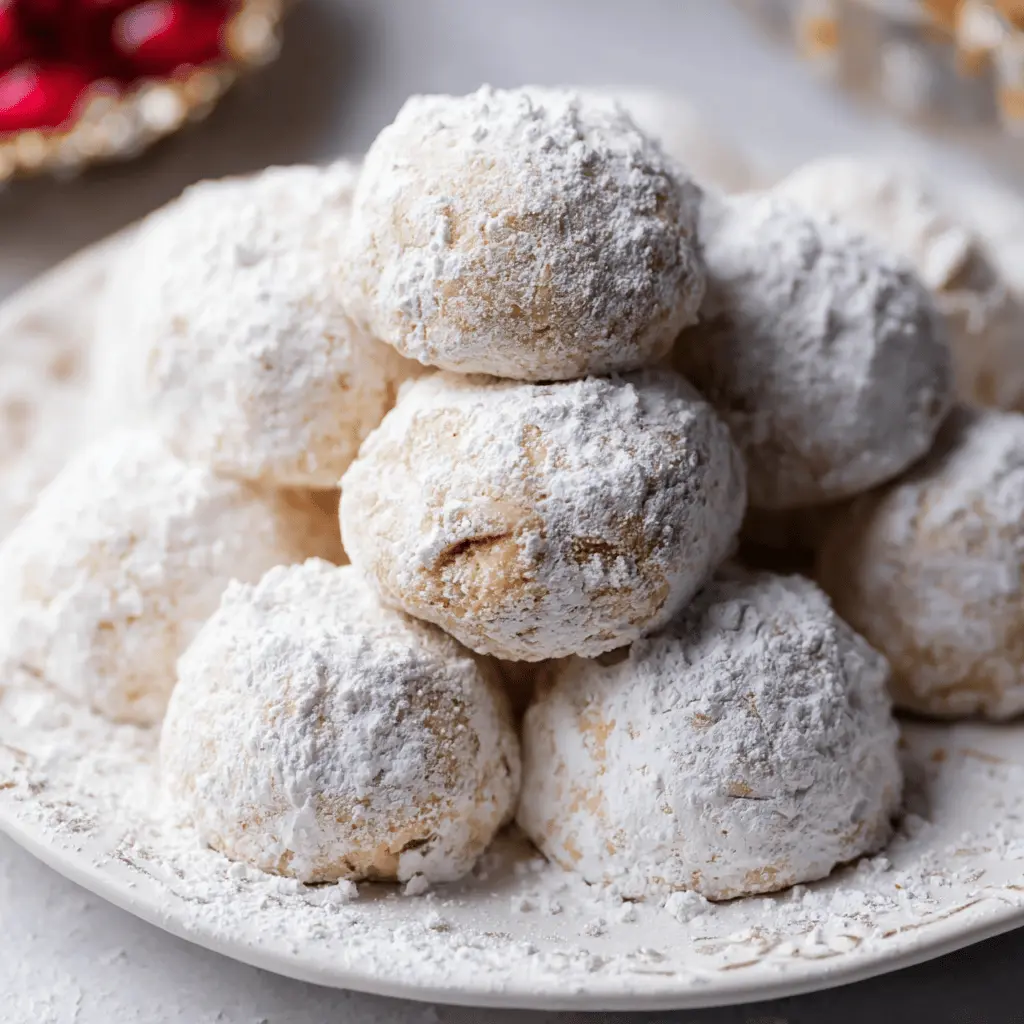
Snowball cookies, often referred to as Russian tea cakes or Mexican wedding cookies, are not just delightful treats; they carry a rich history and a universal charm. Their buttery, crumbly texture and sweetness create a comforting experience that appeals to bakers and cookie enthusiasts alike. Typically made with just a handful of ingredients such as flour, butter, nuts, and powdered sugar, they’re deceptively simple to prepare, making them perfect for both novice bakers and seasoned pros.
The snowball cookies recipe is incredibly versatile, allowing you to experiment with different nuts and flavorings to suit your taste. Whether you prefer pecans, walnuts, or even almonds, each nut brings its unique flair to the mix, keeping things exciting and fresh. Plus, the festive dusting of powdered sugar gives them that beautiful snowy appearance, evoking images of winter wonderlands and holiday celebrations.
Why They’re Perfect for Celebrations
Beyond their delectable flavor, snowball cookies embody the spirit of sharing and giving. They are often a staple at holiday parties, potlucks, and cookie exchanges, bringing friends and families together. Imagine sitting around the table with loved ones, a plate of snowball cookies in the center, as laughter and stories fill the air—there’s a special magic in that.
The nostalgia associated with these cookies cannot be overlooked; many of us have fond memories of baking them with family members during the holidays. They evoke a sense of comfort, warmth, and shared joy, making them much more than just a dessert; they’re a tradition.
So, as you dive into the world of baking with this snowball cookies recipe, remember that you’re creating more than just cookies—you’re weaving memories and continuing a legacy of sweetness that can span generations. Let’s get started!
Ingredients for Snowball Cookies
To create these delightful treats, let’s gather some essential ingredients for our beloved snowball cookies recipe. These melt-in-your-mouth confections are not only a holiday favorite but also perfect for year-round snacking. Here’s what you’ll need:
- Unsalted Butter: The star of the show! Use about 1 cup, softened to ensure a creamy blend.
- Powdered Sugar: Around ½ cup adds sweetness without being overwhelming, making your cookies perfectly indulgent.
- Vanilla Extract: A splash (1 teaspoon) enhances the flavor—you can opt for organic for a richer taste.
- All-Purpose Flour: About 2 cups will provide the base for our cookies, giving them that crumbly texture.
- Chopped Nuts: Walnuts or pecans work beautifully! Aim for 1 cup, finely chopped to mix in effortlessly.
- Salt: Just a pinch (1/4 teaspoon) amplifies the flavors.
- Additional Powdered Sugar for Dusting: This is an absolute must for that classic snowy finish.
With these ingredients, you’re on your way to baking up a storm! If you’re curious about different cookie textures, check out this guide on the science of baking cookies. It’s a treasure trove of useful knowledge!
Preparing Snowball Cookies
Making snowball cookies is not only a delightful experience, but it also fills your kitchen with mouthwatering aromas that can make anyone feel at home. These little treats are perfect for the holiday season, cozy gatherings, or just when you want to brighten your day with some homemade goodness. Let’s walk through the simple steps of this snowball cookies recipe that is sure to become a favorite!
Gather your ingredients
Before diving into mixing and measuring, let’s gather everything you’ll need. Here’s a basic list of ingredients to get you started:
- 1 cup unsalted butter (softened to room temperature)
- 1/2 cup powdered sugar (plus more for dusting)
- 1 teaspoon vanilla extract
- 2 cups all-purpose flour
- 1 cup finely chopped nuts (walnuts or pecans work wonderfully)
- 1/4 teaspoon salt
Make sure to have all these ingredients in front of you. It really does help avoid those last-minute trips to the store! If you’re curious about where to find high-quality nuts or any specialty ingredients, check out reputable grocery sites like Whole Foods for ideas.
Mix the butter and sugar
Now let’s get our hands a bit dirty, shall we? In a large mixing bowl, cream together your softened butter and powdered sugar until the mixture is light and fluffy. This step is crucial as it incorporates air into the dough, helping the cookies achieve a light, melt-in-your-mouth texture.
Add in the vanilla extract and continue mixing, ensuring everything is well combined. The aroma of the butter and sugar blending together is simply divine—just a taste of what’s to come! For more tips on creaming butter and sugar effectively, check out this insightful article by Serious Eats.
Incorporate the dry ingredients
Once your butter-sugar mixture is looking good, it’s time to add the dry ingredients. Gently sift the flour and salt into the bowl, followed by those finely chopped nuts. Mix it all together just until combined; avoid overmixing, as this can lead to denser cookies. You want the dough to be soft and slightly sticky but still manageable.
As you mix, imagine how delicious these cookies will be once they’re rolled in powdered sugar and served at your next gathering. You won’t believe how quickly they’ll disappear!
Chill the dough
After mixing, it’s essential to chill the dough. Wrap it in plastic wrap or place it in an airtight container and let it chill in the refrigerator for at least an hour. Chilling helps to firm up the butter, giving your cookies that perfect structure once baked. While you wait, this is a great time to reflect on past holiday memories or even sip on a warm drink—maybe a comforting cup of tea or hot cocoa?
Shape and bake the cookies
Once the dough has chilled, preheat your oven to 350°F (175°C). Take small amounts of dough (about a tablespoon) and roll them into balls, placing them on a baking sheet lined with parchment paper. Give them some space, as they’ll slightly spread while baking.
Bake for about 10-12 minutes, or until the tops are set but not browned. As they come out of the oven, they should look just a tad soft—trust me, they’ll firm up as they cool.
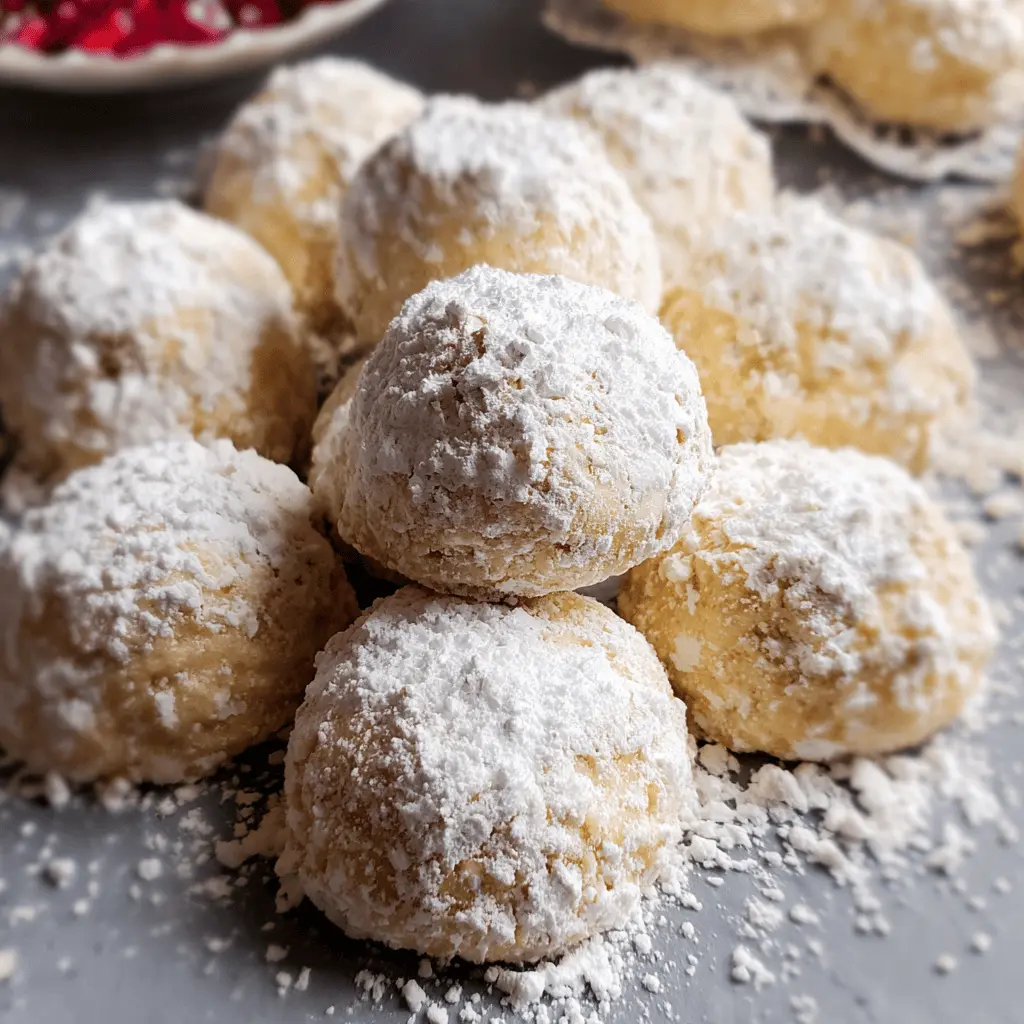
Once out, let them cool for a few minutes before rolling them in powdered sugar. The contrast between the snowball cookie’s snowy exterior and its pastel interior is gorgeous and irresistible!
For more tutorials and inspiration for holiday baking, consider checking out BBC Good Food for additional cookie recipes and tips!
With these simple steps, you’re well on your way to creating delightful snowball cookies that are sure to warm hearts that indulge in their sweetness. Happy baking!
Variations on Snowball Cookies
Snowball cookies are a delightful treat that can easily adapt to suit your preferences and dietary needs. Here are a few delicious variations that will help you elevate your snowball cookies recipe!
Classic Pecan Snowball Cookies
For a quintessential version, nothing beats classic pecan snowball cookies. Combining buttery dough with finely chopped pecans, these cookies melt in your mouth. The rich, nutty flavor pairs wonderfully with the sweet dusting of powdered sugar. To make them, simply follow your favorite base snowball cookies recipe, substituting the nuts with pecans. The crunch of the nuts adds texture while enhancing the overall taste.
Chocolaty Indulgence: Chocolate Snowball Cookies
If you’re a chocolate lover, these chocolate snowball cookies are a must-try. By incorporating cocoa powder into the dough, you create a rich chocolate version that’s equally delightful. You can also mix in chocolate chips for an extra chocolaty bite! Just remember, the powdered sugar dusting is key to keeping that classic snowball Cookie look.
Allergy-Friendly Nut-Free Snowball Cookies
For those with nut allergies, try nut-free snowball cookies. Instead of nuts, you can use seeds like sunflower or pumpkin for a pleasant crunch and flavor profile. Creating a nut-free variation also opens up the chance to play with flavors—consider adding spices like cinnamon or cocoa for unique twists.
No matter which variation you choose, snowball cookies bring joy to any gathering. So why not experiment with these delicious alternatives? They’re easy to share and always a hit! For further inspiration, check out Food Network for more baking tips.
Baking Tips for Snowball Cookies
Baking snowball cookies can be a delightful experience, especially when you know a few tips to make the process smoother. Here are some helpful insights that can elevate your snowball cookies recipe:
Use Quality Ingredients
Always opt for high-quality butter and nuts. Unsalted butter allows you to control the salt level, while fresh nuts add a robust flavor. Consider toasting your nuts lightly to enhance their taste.
Chill the Dough
After mixing your ingredients, chilling the dough for at least an hour is key. This helps the flavors to meld and prevents the cookies from spreading too much during baking.
Roll with Precision
When rolling the cookies, aim for uniform sizes. This ensures even baking. A small cookie scoop can be a handy tool for achieving consistency.
Don’t Rush the Powdered Sugar Coating
Once your cookies are out of the oven, give them time to cool slightly before rolling them in powdered sugar. This helps the sugar adhere better, giving that classic snowball look.
Baking is all about experimenting. Don’t hesitate to reach out to fellow bakers or check out resources like King Arthur Baking for more tips and inspiration!
Serving Suggestions for Snowball Cookies
When it comes to enjoying your delicious snowball cookies, the possibilities are delightful and versatile. These soft, buttery cookies are perfect for a cozy gathering or an afternoon pick-me-up. Here are some creative serving suggestions to enhance your experience with this snowball cookies recipe.
Pair with Hot Beverages
Snowball cookies make an excellent companion for hot beverages. Consider offering them alongside:
- Hot chocolate: The rich cocoa pairs perfectly with the cookie’s buttery texture.
- Freshly brewed coffee: A slightly bitter taste complements the sweetness of the cookies.
- Herbal teas: Mint or chamomile teas bring a lovely balance to the flavors.
Create a Beautiful Dessert Platter
For entertaining, why not arrange your snowball cookies on a dessert platter? Mix in:
- Other festive cookies like ginger snaps or chocolate chip.
- Fresh fruit for a pop of color and freshness.
- A sprinkle of edible flowers for an elegant touch.
Fun and Festive Presentation
Serving your cookies with flair can make all the difference. Consider these ideas:
- Use decorative tins or boxes for gifting.
- Dust with powdered sugar right before serving for a fresh, snowy look.
- Label each cookie type if you’re serving a variety, so guests know what to expect.
Experimenting with these serving suggestions will not only highlight the delightful flavors of your snowball cookies but will also create a memorable experience for everyone involved. Want more tips? Check out this article from Food Network for additional inspiration on cookie presentations!
Time Breakdown for Snowball Cookies
When it comes to making delicious snowball cookies, timing is everything! Here’s how it all breaks down:
Preparation Time
Expect to spend about 15-20 minutes prepping your ingredients and mixing the dough. It’s a quick and fun part of the process, allowing you to play around with flavors if you’re feeling adventurous!
Baking Time
Once your cookies are shaped, they need 10-12 minutes in the oven. You’ll want to keep an eye on them to ensure they achieve that perfect, golden exterior.
Total Time
In just around 30-40 minutes, you can have your delightful snowball cookies fresh and ready to enjoy. For more serving suggestions and tips on pairings, like tea or coffee, check out The Spruce Eats for ideas that complement this snowball cookies recipe!
Nutritional Facts for Snowball Cookies
When whipping up a batch of these delightful treats from our snowball cookies recipe, it’s good to know what you’re indulging in. Here’s a breakdown of the essential nutritional facts to keep in mind.
Calories
Each snowball cookie packs approximately 100 calories. This makes them a rich yet manageable snack, perfect for a midday treat or dessert to share with friends. Moderation is key, though!
Sugar Content
With around 6 grams of sugar per cookie, these sweet bites strike a balance between indulgent and satisfying. If you’re looking to adjust sugar intake, consider experimenting with sugar alternatives.
Fat Content
Each cookie contains about 5 grams of fat, mainly from the butter used in the recipe. For a lighter version, you might swap in a bit of coconut oil or opt for a butter substitute. However, keep in mind that the traditional buttery flavor is part of what makes these cookies so irresistible!
For a detailed nutritional analysis, check out resources such as the USDA FoodData Central or NutritionData, where you can explore the specifics of baking ingredients further. Remember, it’s all about enjoying these scrumptious cookies while staying mindful of the ingredients!
FAQs about Snowball Cookies
Can I make these cookies gluten-free?
Absolutely! If you’re following a gluten-free diet, you can easily adapt the snowball cookies recipe. Substitute the all-purpose flour with a 1:1 gluten-free flour blend, making sure it contains xanthan gum for the best texture. Brands like Bob’s Red Mill or King Arthur Flour have great gluten-free options that work well in baked goods. Just keep an eye on the dough as it may vary slightly in consistency.
How should I store leftover snowball cookies?
To keep your snowball cookies fresh and delicious, store them in an airtight container at room temperature. Layer them with parchment paper to prevent them from sticking together. They can typically last about a week, but let’s be honest—it’s hard to resist these treats for that long! For optimal freshness, avoid exposing them to direct sunlight or heat.
Can I freeze snowball cookies?
Yes, you can absolutely freeze snowball cookies! In fact, freezing them is a fantastic way to keep your treats on hand for a rainy day. Allow the cookies to cool completely, then place them in a single layer on a baking sheet and freeze until solid. Once frozen, transfer them to a freezer-safe container or zip-top bag. They can last for up to three months. To enjoy, simply let them thaw at room temperature—or if you’re feeling a little impatient, pop them in the microwave for a few seconds for that fresh-baked experience.
By answering these common questions about the snowball cookies recipe, I hope to inspire you to get baking and experimenting in the kitchen! If you’re looking for more creative cookie ideas, check out resources from the Food Network or BBC Good Food.
Conclusion on Snowball Cookies
In summary, this snowball cookies recipe is a delightful addition to your baking repertoire. With their buttery flavor and melt-in-your-mouth texture, these cookies are sure to impress friends and family alike. They’re perfect for holiday gatherings, casual get-togethers, or even as a sweet treat just because!
What I love most about snowball cookies is their versatility; you can easily add in different nuts or chocolate chips to make them your own. If you haven’t tried making them yet, now’s the perfect time! Embrace the baking adventure and enjoy sharing these sweet little gems with your loved ones. For more tips on perfecting your baking skills, check out resources from the America’s Test Kitchen or the Baker’s Corner.
PrintSnowball Cookies Recipe: The Best Melt-in-Your-Mouth Delight

Discover how to make the best snowball cookies that are truly a melt-in-your-mouth delight.
- Prep Time: 20 minutes
- Cook Time: 20 minutes
- Total Time: 40 minutes
- Yield: 24 cookies 1x
- Category: Dessert
- Method: Baked
- Cuisine: American
Ingredients
- 1 cup unsalted butter, softened
- 1/2 cup powdered sugar
- 2 cups all-purpose flour
- 1/4 teaspoon salt
- 1 cup chopped nuts (walnuts or pecans)
- 1 teaspoon vanilla extract
- 1/4 cup additional powdered sugar for dusting
Instructions
- Preheat the oven to 350°F (175°C).
- In a large bowl, cream together the softened butter and 1/2 cup powdered sugar until light and fluffy.
- Mix in the vanilla extract.
- Gradually add the flour and salt, mixing until combined.
- Stir in the chopped nuts.
- Shape the dough into 1-inch balls and place them on a baking sheet lined with parchment paper.
- Bake for 15-20 minutes or until the bottoms are lightly golden.
- Allow the cookies to cool slightly, then roll them in the additional powdered sugar.
Notes
- For a richer flavor, toast the nuts before adding them to the dough.
- These cookies can be rolled in sugar before baking for a different texture.
Nutrition
- Serving Size: 2 cookies
- Calories: 150
- Sugar: 6g
- Sodium: 60mg
- Fat: 10g
- Saturated Fat: 6g
- Unsaturated Fat: 3g
- Trans Fat: 0g
- Carbohydrates: 15g
- Fiber: 0g
- Protein: 2g
- Cholesterol: 30mg
Keywords: Snowball Cookies, cookie recipe, melt in your mouth cookies